Android运行机制 一般而言,在启动一个 App 时,Android 会首先执行 Application 类(AndroidManifest.xml 文件中注明)的创建工作,然后再开始执行 Main Activity,继而根据各种各样的逻辑执行相关代码。
Android 逆向
分析方法,可以采用以下方式
静态分析,对源代码进行逆向,然后阅读分析
动态分析,对代码进行动态调试,一般来说动态分析离不开静态分析。
分析对象,一般有以下两类对象
Android 逆向主要应用于以下几个方向
app 安全审查
系统漏洞挖掘
恶意代码杀查
同行业产品技术原理分析
移除安全机制
AndroidManifest.xml 文件
软件包名
apk 主活动,隐藏程序没有主 Activity
Application 在 java 层启动最早
逆向技巧 字符串定位:
敏感API定位:
控件的事件函数
网络函数
HttpGet
HttpPost
HttpUriRequest
socket
发送短信
打电话
定位
等等
log信息:
利用程序本身产生的 log 信息
自己对代码反编译,插入 log 信息,并重打包来进行分析。
栈跟踪:
我们可以用 ddms 提供的方法调用链的信息来判断程序目前的调用关系如何。
钩子:
monitor:
运行 log,程序运行产生的,系统运行产生的
线程跟踪
方法调用链
环境搭建 mumu模拟器、adb、jadx和frida
1
2
3
4
5
6
7
8
9
10
11
12
13
14
15
# win adb connect 127.0.0.1:16384 # mumu->问题诊断 adb调试端口16384 adb devices #显示已连接设备 adb shell getprop ro.product.cpu.abi #查看系统型号 adb push frida-server-16.6.6-android-x86_64 /data/local/tmp #将frida-server push进模拟器 adb root #root adb shell #root进shell # shell cd /data/local/tmp chmod 755 frida-server-16.6.6-android-x86_64 ./frida-server-16.6.6-android-x86_64 # win frida-ps -U #通过USB连接查看进程情况 adb forward tcp:27042 tcp:27042 frida-ps -R #通过远程连接查看进程情况
实战 链接
frida-ps -U找到进程号
frida -U -p 3897
一个简单的石头剪刀布的游戏
1
2
3
4
5
6
7
8
9
10
11
12
13
14
15
16
17
18
19
20
21
22
23
24
25
26
27
28
29
30
31
32
33
34
35
36
37
38
39
40
41
42
43
44
45
46
47
48
49
50
51
52
53
54
55
56
57
58
59
60
61
62
63
64
65
66
67
68
69
70
71
72
73
74
75
76
77
78
79
80
81
82
83
84
85
86
87
88
89
90
91
92
93
94
package com.example.seccon2015.rock_paper_scissors; import android.app.Activity;import android.os.Bundle;import android.os.Handler;import android.view.View;import android.widget.Button;import android.widget.TextView;import java.util.Random;public class MainActivity extends Activity implements View.OnClickListener { Button P; Button S; int flag; int m; int n; Button r; int cnt = 0 ; private final Handler handler = new Handler (); private final Runnable showMessageTask = new Runnable () { @Override public void run () { TextView tv3 = (TextView) MainActivity.this .findViewById (R.id.textView3); if (MainActivity.this .n - MainActivity.this .m == 1 ) { MainActivity.this .cnt++; tv3.setText ("WIN! +" + String.valueOf (MainActivity.this .cnt)); } else if (MainActivity.this .m - MainActivity.this .n == 1 ) { MainActivity.this .cnt = 0 ; tv3.setText ("LOSE +0" ); } else if (MainActivity.this .m == MainActivity.this .n) { tv3.setText ("DRAW +" + String.valueOf (MainActivity.this .cnt)); } else if (MainActivity.this .m < MainActivity.this .n) { MainActivity.this .cnt = 0 ; tv3.setText ("LOSE +0" ); } else { MainActivity.this .cnt++; tv3.setText ("WIN! +" + String.valueOf (MainActivity.this .cnt)); } if (1000 == MainActivity.this .cnt) { tv3.setText ("SECCON{" + String.valueOf ((MainActivity.this .cnt + MainActivity.this .calc ()) * 107 ) + "}" ); } MainActivity.this .flag = 0 ; } }; public native int calc () static { System.loadLibrary ("calc" ); } @Override protected void onCreate (Bundle savedInstanceState) super.onCreate (savedInstanceState); setContentView (R.layout.activity_main); this .P = (Button) findViewById (R.id.button); this .S = (Button) findViewById (R.id.button3); this .r = (Button) findViewById (R.id.buttonR); this .P.setOnClickListener (this ); this .r.setOnClickListener (this ); this .S.setOnClickListener (this ); this .flag = 0 ; } @Override public void onClick (View v) if (this .flag != 1 ) { this .flag = 1 ; TextView tv3 = (TextView) findViewById (R.id.textView3); tv3.setText ("" ); TextView tv = (TextView) findViewById (R.id.textView); TextView tv2 = (TextView) findViewById (R.id.textView2); this .m = 0 ; Random rm = new Random (); this .n = rm.nextInt (3 ); String[] ss = {"CPU: Paper" , "CPU: Rock" , "CPU: Scissors" }; tv2.setText (ss[this .n]); if (v == this .P) { tv.setText ("YOU: Paper" ); this .m = 0 ; } if (v == this .r) { tv.setText ("YOU: Rock" ); this .m = 1 ; } if (v == this .S) { tv.setText ("YOU: Scissors" ); this .m = 2 ; } this .handler.postDelayed (this .showMessageTask, 1000L ); } } }
Android 会首先执行 Application 类,但是开发者一般是不需要去处理它的,对于Activity来说,标准的生命周期入口点是:**onCreate() 方法**,我们就可以通过重写来调用我们的第一个方法
逆向分析 1 2 3 4 5 6 7 8 9 10 11 12 @Override protected void onCreate (Bundle savedInstanceState) super.onCreate (savedInstanceState); setContentView (R.layout.activity_main); this .P = (Button) findViewById (R.id.button); this .S = (Button) findViewById (R.id.button3); this .r = (Button) findViewById (R.id.buttonR); this .P.setOnClickListener (this ); this .r.setOnClickListener (this ); this .S.setOnClickListener (this ); this .flag = 0 ; }
首先调用父类(Activity)的 onCreate 方法(必须)
setContentView(R.layout.activity_main);这是将XML布局文件渲染成可视化的界面,在jadx里双击可以发现定义
1 public static final int activity_main = 0x7f040018 ;
传入资源ID 0x7f040018
系统解析:
包ID 0x7f → 当前应用资源
类型ID 0x04 → layout类型
项ID 0x0018 → 第24个layout资源
查找 resources.arsc 表
找到对应的 activity_main.xml 文件
加载并渲染布局
1 2 3 this .P = (Button) findViewById (R.id.button);this .S = (Button) findViewById (R.id.button3);this .r = (Button) findViewById (R.id.buttonR);
获取布局文件中定义的按钮空间引用,跟上述的资源ID是类似的
1 2 3 this .P.setOnClickListener (this );this .r.setOnClickListener (this );this .S.setOnClickListener (this );
为这些按钮设置点击事件监视器
之后设置flag=0完成初始化;
1 2 3 4 5 6 7 8 9 10 11 12 13 14 15 16 17 18 19 20 21 22 23 24 25 26 27 28 @Override public void onClick (View v) if (this .flag != 1 ) { this .flag = 1 ; TextView result = (TextView) findViewById (R.id.textView3); result.setText ("" ); TextView user = (TextView) findViewById (R.id.textView); TextView laptop = (TextView) findViewById (R.id.textView2); this .m = 0 ; Random rm = new Random (); this .n = rm.nextInt (3 ); String[] ss = {"CPU: Paper" , "CPU: Rock" , "CPU: Scissors" }; laptop.setText (ss[this .n]); if (v == this .P) { user.setText ("YOU: Paper" ); this .m = 0 ; } if (v == this .r) { user.setText ("YOU: Rock" ); this .m = 1 ; } if (v == this .S) { user.setText ("YOU: Scissors" ); this .m = 2 ; } this .handler.postDelayed (this .showMessageTask, 1000L ); } }
点击之后就会触发onClick,逻辑很简单,电脑会随机输出,然后比对,之后延迟1s通过this.showMessageTask来显示结果
1 2 3 4 5 6 7 8 9 10 11 12 13 14 15 16 17 18 19 20 21 22 23 24 25 26 27 private final Handler handler = new Handler ();private final Runnable showMessageTask = new Runnable () { @Override public void run () { TextView tv3 = (TextView) MainActivity.this .findViewById (R.id.textView3); if (MainActivity.this .n - MainActivity.this .m == 1 ) { MainActivity.this .cnt++; tv3.setText ("WIN! +" + String.valueOf (MainActivity.this .cnt)); } else if (MainActivity.this .m - MainActivity.this .n == 1 ) { MainActivity.this .cnt = 0 ; tv3.setText ("LOSE +0" ); } else if (MainActivity.this .m == MainActivity.this .n) { tv3.setText ("DRAW +" + String.valueOf (MainActivity.this .cnt)); } else if (MainActivity.this .m < MainActivity.this .n) { MainActivity.this .cnt = 0 ; tv3.setText ("LOSE +0" ); } else { MainActivity.this .cnt++; tv3.setText ("WIN! +" + String.valueOf (MainActivity.this .cnt)); } if (1000 == MainActivity.this .cnt) { tv3.setText ("SECCON{" + String.valueOf ((MainActivity.this .cnt + MainActivity.this .calc ()) * 107 ) + "}" ); } MainActivity.this .flag = 0 ; } };
设置一个Runnable接口,其中this.handler.postDelayed(this.showMessageTask, 1000L);会调用该接口的run函数且这个接口也只能有一个run函数
1 2 3 4 5 6 7 8 9 10 11 点击事件触发 ↓ handler.postDelayed(task, 1000) ↓ Handler将Runnable封装为Message加入消息队列 ↓ (1秒后) 主线程Looper取出Message ↓ Handler执行Message.callback.run() ↓ 我们的showMessageTask.run()被执行
发现当连胜次数为1000时能获得一个flag
hook 1 <activity android:name="com.example.seccon2015.rock_paper_scissors.MainActivity" >
AndroidManifest.xml查看程序的入口Activity
1 2 3 4 5 6 7 [V2185A::PID::4093 ]-> Java.perform (function () { var MainActivity = Java.use ('com.example.seccon2015.rock_paper_scissors.MainActivity' ); MainActivity.onClick.implementation = function (v) { send ("hook start" ); } }); [V2185A::PID::4093 ]-> message: {'type' : 'send' , 'payload' : 'hook start' } data: None
frida中使用MainActivity.onClick.implementation来进行对函数的hook
1 2 3 4 5 6 7 8 9 10 11 12 13 14 15 16 17 18 19 20 21 22 23 24 25 26 27 28 29 30 31 import frida, sys def on_message (message, data) : print(message) jscode = "" " Java.perform(function(){ var MainActivity = Java.use(" com.example.seccon2015.rock_paper_scissors.MainActivity"); MainActivity.onClick.implementation = function(v){ this.onClick(v); this.n.value = 2; this.m.value = 1; this.cnt.value = 999; send(this.m.value); } }) " "" device = frida.get_usb_device (1000 ) process = device.attach (4836 ) script = process.create_script (jscode) script.on ('message' , on_message) script.load () sys.stdin.read ()
hook内部类
可以直接考虑hook掉com.example.seccon2015.rock_paper_scissors.MainActivity.1,这是showMessageTask接口
1 2 3 4 5 6 7 8 9 10 11 12 13 14 15 16 17 18 19 20 21 22 23 24 25 26 27 28 29 30 import frida, sys def on_message (message, data) : print(message) jscode = "" " Java.perform(function(){ var MainActivity = Java.use(" com.example.seccon2015.rock_paper_scissors.MainActivity$1 "); MainActivity.run.implementation = function(v){ this.this$0.value.m.value=1; this.this$0.value.n.value=2; this.this$0.value.cnt.value=999; this.run(); } }) " "" device = frida.get_usb_device (1000 ) process = device.attach (4836 ) script = process.create_script (jscode) script.on ('message' , on_message) script.load () sys.stdin.read ()
要com.example.seccon2015.rock_paper_scissors.MainActivity$1这么写,然后就不能像之前一样直接this.m调用了,因为showMessageTask是内部类,java为每个内部类自动创建了一个指向外部类实例的字段,通常命名为this$0
1 2 3 4 5 6 Java.Field{ holder: com.example.seccon2015.rock_paper_scissors.MainActivity$1 @732991e, fieldType: 2 , fieldReturnType: Lcom/example/seccon2015/rock_paper_scissors/MainActivity;, value: com.example.seccon2015.rock_paper_scissors.MainActivity@8d9c04, }
发现value就是想要的值, 那么直接this.this$0.value.m.value获取即可
直接调用方法
1 2 3 if (1000 == MainActivity.this .cnt) {tv3.setText ("SECCON{" + String.valueOf ((MainActivity.this .cnt + MainActivity.this .calc ()) * 107 ) + "}" ); }
1 2 3 4 5 6 7 Java.perform (function (){ var MainActivity = Java.use ("com.example.seccon2015.rock_paper_scissors.MainActivity" ); MainActivity.onClick.implementation = function (v){ this .onClick (v); console.log ((1000 + this .calc ())*107 ); } })
也是可以的
1 2 3 4 5 6 7 8 9 10 11 12 13 14 15 16 Java.perform (function (){ var MainActivity = Java.use ("com.example.seccon2015.rock_paper_scissors.MainActivity" ); MainActivity.onClick.implementation = function (v){ this .onClick (v); var modules = Process.enumerateModules (); for (var i in modules){ if (modules[i].name == "libcalc.so" ){ var exports = modules[i].enumerateExports (); for (var j in exports){ console.log (exports[j].name); } } } } })
列举输出libcalc.so动态库导出的函数
1 2 3 4 5 6 7 8 Java.perform (function (){ var MainActivity = Java.use ("com.example.seccon2015.rock_paper_scissors.MainActivity" ); MainActivity.onClick.implementation = function (v){ this .onClick (v); var addr = Module.findExportByName ("libcalc.so" ,"Java_com_example_seccon2015_rock_1paper_1scissors_MainActivity_calc" ); console.log (addr); } })
输出Java_com_example_seccon2015_rock_1paper_1scissors_MainActivity_calc这个符号对应方法的地址
1 2 3 4 5 6 7 8 9 10 Java.perform (function (){ var MainActivity = Java.use ("com.example.seccon2015.rock_paper_scissors.MainActivity" ); MainActivity.onClick.implementation = function (v){ this .onClick (v); var addr = Module.findExportByName ("libcalc.so" ,"Java_com_example_seccon2015_rock_1paper_1scissors_MainActivity_calc" ); console.log (addr); var func = new NativeFunction (addr,"int" ,[]); console.log (func ()); } })
使用NativeFunction得到对应的方法,并之后运行该函数
lab 0x1 一个猜数字的,直接hook掉onClick调用check带有固定参数即可
1 2 3 4 5 6 7 8 9 10 11 12 13 14 15 16 17 18 19 20 21 22 23 24 25 26 27 import frida, sys def on_message (message, data) : print(message) jscode = "" " Java.perform(function(){ var MainActivity = Java.use(" com.ad2001.frida0x1.MainActivity$1 "); MainActivity.onClick.implementation = function(v){ this.this$0.value.check(1,6); } }) " "" device = frida.get_usb_device (1000 ) process = device.attach (5409 ) script = process.create_script (jscode) script.on ('message' , on_message) script.load () sys.stdin.read ()
0x2 直接使用python脚本 attack pid对其进行hook是行不通,在运行的时候会调用完onCreate方法,没有其他的方法调用能让我们进行hook,因此得在启动的瞬间就得直接进行hook的注入
1 2 3 4 5 6 7 8 9 Java.perform (function () { var MainActivity = Java.use ("com.ad2001.frida0x2.MainActivity" ); MainActivity.onCreate.overload ('android.os.Bundle' ).implementation = function (bundle) { this .onCreate (bundle); console.log ("触发get_flag方法..." ); console.log (this .get_flag (4919 )); }; });
保存为hook.js
1 frida -U -f com.ad2001.frida0x2 -l hook.js
就能在模拟器中看到flag啦,虽然还有报error为undefine(但问题应该不大?
0x3 hook掉Checker静态变量code的值,然后再重新调用onClick
1 2 3 4 5 6 7 8 9 10 11 12 13 14 15 16 17 18 19 20 21 22 23 24 25 26 27 28 29 import frida, sysdef on_message (message, data ): print (message) jscode = """ Java.perform(function(){ var MainActivity = Java.use("com.ad2001.frida0x3.MainActivity$1"); MainActivity.onClick.implementation = function(v){ var checker = Java.use("com.ad2001.frida0x3.Checker"); checker.code.value=512; this.onClick(v); } }) """ device = frida.get_usb_device(1000 ) process = device.attach(2977 ) script = process.create_script(jscode) script.on('message' , on_message) script.load() sys.stdin.read()
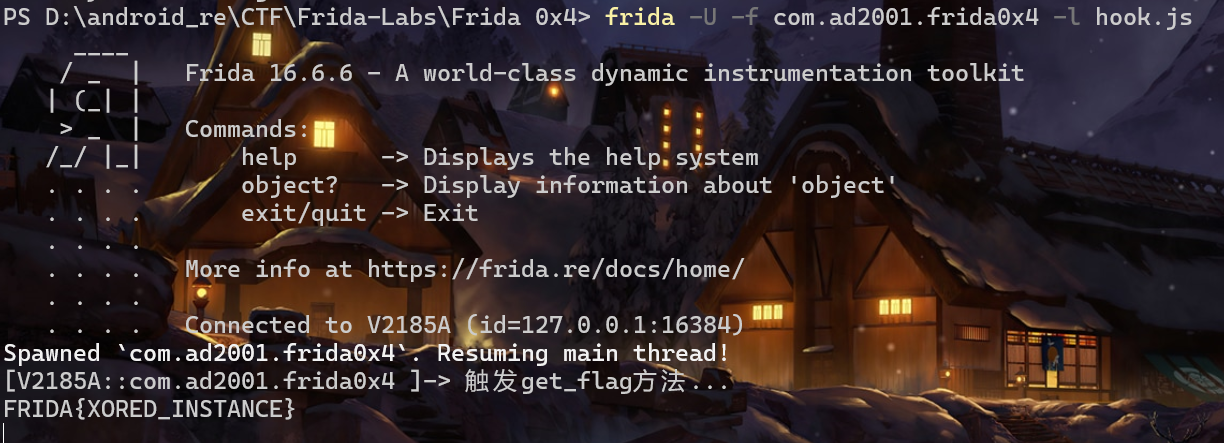
0x4 在其他方法里有一个get_flag函数,同0x2类似,hook掉onCreate即可
1 2 3 4 5 6 7 8 9 10 11 12 Java.perform (function () { var MainActivity = Java.use ("com.ad2001.frida0x4.MainActivity" ); MainActivity.onCreate.overload ('android.os.Bundle' ).implementation = function (bundle) { this .onCreate (bundle); console.log ("触发get_flag方法..." ); var checker = Java.use ("com.ad2001.frida0x4.Check" ) var check = checker.$new (); console.log (check.get_flag (1337 )); }; });
这里记住get_flag不是静态方法,需要先实例化 然后才能调用
0x5 同上,直接hook onCreate调flag方法即可
0x6 需要在传参的时候传入一个实例化的checker,并对其中的变量进行赋值,hook掉onCreate
1 2 3 4 5 6 7 8 9 10 11 12 13 14 Java.perform (function () { var MainActivity = Java.use ("com.ad2001.frida0x6.MainActivity" ); MainActivity.onCreate.overload ('android.os.Bundle' ).implementation = function (bundle) { this .onCreate (bundle); console.log ("触发get_flag方法..." ); var checker = Java.use ("com.ad2001.frida0x6.Checker" ) var check = checker.$new (); check.num1.value=1234 ; check.num2.value=4321 ; this .get_flag (check); }; });
0x7 1 2 3 4 5 6 7 8 9 10 11 12 Java.perform (function (){ var MainActivity = Java.use ("com.ad2001.frida0x7.MainActivity" ); MainActivity.flag.implementation = function (v){ var check=Java.use ("com.ad2001.frida0x7.Checker" ); var check_instance=check.$new (0 , 0 ); check_instance.num1.value=1000 ; check_instance.num2.value=1000 ; this .flag (check_instance); } })
要求在checker存在变量的时候,实例化要进行参数的指定,不然会报错
0x8 一些frida用法
1 2 3 4 5 6 7 8 9 10 11 12 13 14 15 16 17 18 19 20 21 22 23 24 25 26 27 28 29 30 31 32 33 34 35 36 37 38 39 40 41 42 43 44 45 46 47 48 49 50 51 52 53 54 55 56 57 58 59 60 61 62 63 64 65 66 67 68 69 70 71 72 73 74 75 76 77 78 79 80 [V2185A::com.ad2001.frida0x8 ]-> Module.enumerateExports ("libfrida0x8.so" ) [ { "address" : "0x706e3cef88c0" , "name" : "Java_com_ad2001_frida0x8_MainActivity_cmpstr" , "type" : "function" }, { "address" : "0x706e3cef8aa0" , "name" : "_ZN7_JNIEnv17GetStringUTFCharsEP8_jstringPh" , "type" : "function" }, { "address" : "0x706e3cef8ae0" , "name" : "_ZN7_JNIEnv21ReleaseStringUTFCharsEP8_jstringPKc" , "type" : "function" } ] [V2185A::com.ad2001.frida0x8 ]-> Module.enumerateExports ("libfrida0x8.so" )[0 ].address "0x706e3cef88c0" [V2185A::com.ad2001.frida0x8]-> Module.getExportByName ("libfrida0x8.so" ,"Java_com_ad2001_frida0x8_MainActivity_cmpstr" ) "0x706e3cef88c0" [V2185A::com.ad2001.frida0x8 ]-> Module.findExportByName ("libfrida0x8.so" ,"Java_com_ad2001_frida0x8_MainActivity_cmpstr " )"0x706e3cef88c0" [V2185A::com.ad2001.frida0x8 ]-> Module.getBaseAddress ("libfrida0x8.so" ) "0x706e3cef8000" [V2185A::com.ad2001.frida0x8 ]-> Module.enumerateImports ("libfrida0x8.so" ) [ { "address" : "0x7070f74e9920" , "module" : "/apex/com.android.runtime/lib64/bionic/libc.so" , "name" : "__cxa_finalize" , "slot" : "0x706e3cef9d90" , "type" : "function" }, { "address" : "0x7070f74e9660" , "module" : "/apex/com.android.runtime/lib64/bionic/libc.so" , "name" : "__cxa_atexit" , "slot" : "0x706e3cef9d98" , "type" : "function" }, { "address" : "0x7070f74e5300" , "module" : "/apex/com.android.runtime/lib64/bionic/libc.so" , "name" : "__register_atfork" , "slot" : "0x706e3cef9da0" , "type" : "function" }, { "address" : "0x7070f74a7970" , "module" : "/apex/com.android.runtime/lib64/bionic/libc.so" , "name" : "__strlen_chk" , "slot" : "0x706e3cef9db0" , "type" : "function" }, { "address" : "0x7070f7475040" , "module" : "/apex/com.android.runtime/lib64/bionic/libc.so" , "name" : "strcmp" , "slot" : "0x706e3cef9db8" , "type" : "function" }, { "address" : "0x7070fb675140" , "module" : "/system/lib64/liblog.so" , "name" : "__android_log_print" , "slot" : "0x706e3cef9dc0" , "type" : "function" }, { "address" : "0x7070f74906b0" , "module" : "/apex/com.android.runtime/lib64/bionic/libc.so" , "name" : "__stack_chk_fail" , "slot" : "0x706e3cef9dd0" , "type" : "function" } ]
因为这个lab使用的native层里的函数,因此按照之前的方式进行hook就会出现问题,因此引入一个api
1 2 3 4 5 6 7 8 9 10 Interceptor.attach (targetAddress, { onEnter: function (args) { console.log ('Entering ' + functionName); }, onLeave: function (retval) { console.log ('Leaving ' + functionName); } });
Interceptor.attach:为指定的函数地址附加一个回调。targetAddress 应该是我们想要 hook 的原生函数的地址。onEnter:当 被hook的函数 进入时调用该回调。它提供对函数参数 (args) 的访问 。onLeave:当 被hook的函数 即将退出时调用该回调。它提供对返回值 (retval) 的访问。
而之前提到的都是能够获得addr的api,因此我们可以考虑hook掉strcmp来获取他的参数,因为在libfrida0x8.so中strcmp的参数有包括flag的值
1 2 3 4 5 6 7 8 9 10 11 12 13 14 15 16 17 18 19 20 21 22 23 24 25 26 27 28 29 30 31 32 33 34 35 36 37 38 39 import frida, sysdef on_message (message, data ): print (message) jscode = """ Java.perform(function(){ var MainActivity = Java.use("com.ad2001.frida0x8.MainActivity$1"); MainActivity.onClick.implementation = function(v){ var strcmp_addr=Module.findExportByName("libc.so","strcmp"); Interceptor.attach(strcmp_addr, { onEnter: function (args) { var string=Memory.readUtf8String(args[0]) if(string=="abcd") console.log(Memory.readUtf8String(args[1])); // Modify or log arguments if needed }, onLeave: function (retval) { // Modify or log return value if needed } }); this.onClick(v); } }) """ device = frida.get_usb_device(1000 ) process = device.attach(6861 ) script = process.create_script(jscode) script.on('message' , on_message) script.load() sys.stdin.read()
记得在hook之后重新调用onClick(好玩!
0x9 1 2 3 4 5 6 7 8 9 10 11 12 13 14 15 16 17 18 19 20 21 22 23 24 25 26 27 28 29 30 31 32 33 34 35 36 37 import frida, sys def on_message (message, data) : print(message) jscode = "" " Java.perform(function() { var MainActivity = Java.use(" com.ad2001.a0x9.MainActivity$1 "); MainActivity.onClick.implementation = function(v) { console.log(" [*] onClick 被调用"); var check_flag = Module.findExportByName(" liba0x9.so", " Java_com_ad2001_a0x9_MainActivity_check_1flag"); Interceptor.attach(check_flag, { onEnter: function(args) { console.log(" [*] check_flag 被调用"); }, onLeave: function(retval) { retval.replace(1337); // 修改返回值为 1337 } }); this.onClick(v); }; }); " "" device = frida.get_usb_device (1000 ) process = device.attach (7244 ) script = process.create_script (jscode) script.on ('message' , on_message) script.load () sys.stdin.read ()
替换返回值即可
0xa 这里我选择的是直接hook掉android_log_print函数,因为在get_flag中该函数的参数包含一个flag的指针,如此便可以获得flag的值
1 2 3 4 5 6 7 8 9 10 11 12 13 14 15 16 17 18 19 20 Java.perform (function () { var MainActivity = Java.use ("com.ad2001.frida0xa.MainActivity" ); MainActivity.onCreate.overload ('android.os.Bundle' ).implementation = function (bundle) { this .onCreate.call (this , bundle); var get_flag = new NativeFunction ( Module.findExportByName ("libfrida0xa.so" , "_Z8get_flagii" ), 'void' , ['int' , 'int' ] ); get_flag (0 , 3 ); }; Interceptor.attach (Module.findExportByName ("liblog.so" , "__android_log_print" ), { onEnter: function (args) { if (Memory.readUtf8String (args[1 ]).includes ("FLAG" )) { console.log ("[FLAG] " + Memory.readUtf8String (args[3 ])); } } }); });
0xb 这里发现在getflag函数中,其中的逻辑导致无法对函数体进行合理的利用,因此考虑直接对jnz进行一个nop,也或者可以直接hook跳到正确的函数体
1 2 3 4 5 6 7 8 9 10 11 12 13 14 15 16 17 18 19 20 21 22 23 24 25 Java.perform (function () { Interceptor.attach (Module.findExportByName ("liblog.so" , "__android_log_print" ), { onEnter: function (args) { var tag = Memory.readUtf8String (args[1 ]); if (tag.includes ("FLAG" )) { console.log ("[FLAG] " + Memory.readUtf8String (args[3 ])); } } }); Java.choose ("com.ad2001.frida0xb.MainActivity" , { onMatch: function (obj) { Interceptor.attach (Module.getExportByName ("libfrida0xb.so" , "Java_com_ad2001_frida0xb_MainActivity_getFlag" ), { onEnter: function (args) { Memory.protect (Module.findBaseAddress ("libfrida0xb.so" ).add (0x170ce ), 4 , 'rwx' ); new X86Writer (Module.findBaseAddress ("libfrida0xb.so" ).add (0x170ce )).putNop ().flush (); } }); obj.getFlag (); } }); });
这样就可以了
PS:最后发现无需hook掉日志输出函数,其实一开始就应该明白的,毕竟机器都root了,怎么还看不了日志(,adb中就有logcat,可恶!!